This tutorial is a practice session of learning video processing using web camera in a laptop. The code is in python and you need to have openCV, numpy and math modules installed.
OpenCV Installation
OpenCV in Python works only for Python2.7. If you are using Python 3, you need to install Python 2.
- Install Python 2.7
- Install Numpy
- Download the latest version of OpenCV in Sourceforce or GitHub
- Extract the OpenCV. From the folder where you extracted, goto folder:
yourOpenCVFolder\opencv\build\python\2.7
- Copy file cv2.pyd to your python folder\lib\site-packages.
I am using Jupyter based on Anaconda, thus the python folder is
C:\Users\ UserName \AppData\Local\conda\conda\envs\ipykernel_py2\Lib\site-packages
Test if it works:
import numpy as np
import cv2
print( cv2.__version__ )
Basic Video Capture
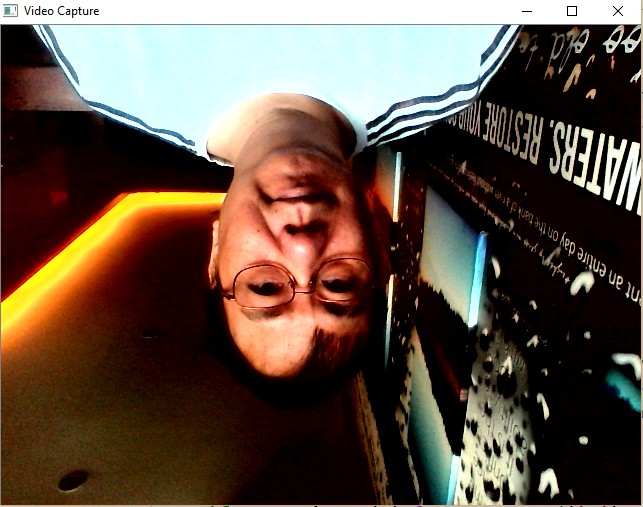
The following code is to capture the video using the webcam on your laptop. It will open a window contains the images captured by the webcam. There is no processing aside from simple showing it. Press q to quit the window.
Tips: If you found error during your experiments, restart the kernel and try again.
import numpy as np
import cv2

cap = cv2.VideoCapture(0)

while(True):
    # Capture frame-by-frame
    ret, frame = cap.read()  # ret = 1 if the video is captured; frame is the image

    # Our operations on the frame come here
    img = cv2.flip(frame,1)   # flip left-right
    img = cv2.flip(img,0)     # flip up-down

    # Display the resulting image
    cv2.imshow('Video Capture',img)
    if cv2.waitKey(1) & 0xFF == ord('q'):  # press q to quit
        break

# When everything done, release the capture
cap.release()
cv2.destroyAllWindows()
Sample video capture:
Saving Video
The following code come from OpenCV documentation. I just change the codec to make it work.
import numpy as np
import cv2

# create writer object
fileName='output.avi'  # change the file name if needed
imgSize=(640,480)
frame_per_second=30.0
writer = cv2.VideoWriter(fileName, cv2.VideoWriter_fourcc(*"MJPG"), frame_per_second,imgSize)

cap = cv2.VideoCapture(0)
while(cap.isOpened()):
    ret, frame = cap.read()
    if ret==True:
        writer.write(frame)                   # save the frame into video file
        cv2.imshow('Video Capture',frame)     # show on the screen
        if cv2.waitKey(1) & 0xFF == ord('q'): # press q to quit
            break
    else:
        break

# Release everything if job is finished
cap.release()
writer.release()
cv2.destroyAllWindows()
Loading and Playing Video
Now let us load and play the video that we just captured.
import numpy as np
import cv2

fileName='output.avi'  # change the file name if needed

cap = cv2.VideoCapture(fileName)          # load the video
while(cap.isOpened()):                    # play the video by reading frame by frame
    ret, frame = cap.read()
    if ret==True:
        # optional: do some image processing here

        cv2.imshow('frame',frame)              # show the video
        if cv2.waitKey(1) & 0xFF == ord('q'):
            break
    else:
        break
cap.release()
cv2.destroyAllWindows()
Change Window Size
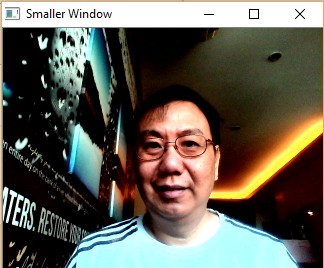
You can change the size of the window by setting the frame size (e.g. 640x480; 320x240; 960x720), larger is slower ad you can see the delay from your movement.
ret = cap.set(cv2.CAP_PROP_FRAME_WIDTH,320) ret = cap.set(cv2.CAP_PROP_FRAME_HEIGHT,240)
Another faster way is to use cv2.resize() function:
frame=cv2.resize(frame,None,fx=scaling_factor,fy=scaling_factor,interpolation=cv2.INTER_AREA)
Experiment:
- Try to change the window size using capture setting or resize function
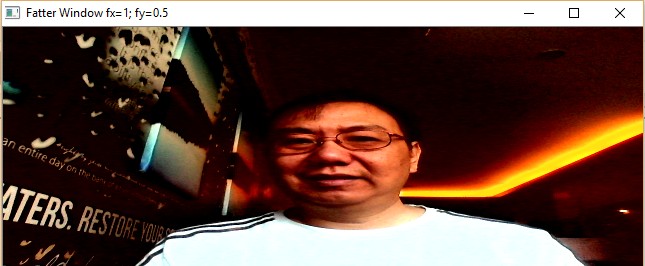
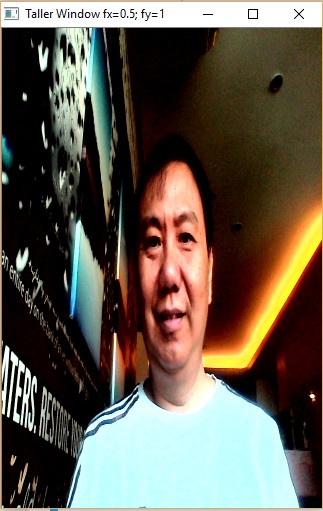
- Try to change the scaling factor of fx and fy
import numpy as np
import cv2

scaling_factorx=0.5
scaling_factory=0.5

cap = cv2.VideoCapture(0)
while(True):
    # Capture frame-by-frame
    ret, frame = cap.read()  # ret = 1 if the video is captured; frame is the image

    # set frame size (e.g. 640x480; 320x240; 960x720), larger is slower
    #ret = cap.set(cv2.CAP_PROP_FRAME_WIDTH,320)
    #ret = cap.set(cv2.CAP_PROP_FRAME_HEIGHT,240)
    frame=cv2.resize(frame,None,fx=scaling_factorx,fy=scaling_factory,interpolation=cv2.INTER_AREA)

    # Our operations on the frame come here
    img = frame

    # Display the resulting image
    cv2.imshow('Smaller Window',img)
    if cv2.waitKey(1) & 0xFF == ord('q'):  # press q to quit
        break

# When everything done, release the capture
cap.release()
cv2.destroyAllWindows()
Sample Screenshots:
Color Transformation
I use basic video capture code. Now we have a simple color transformation
Experiment: Try the following color transformation:
+ img = cv2.cvtColor(frame, cv2.COLOR_BGR2RGB)  # BGR color to RGB
+ img = cv2.cvtColor(frame, cv2.COLOR_RGB2BGR)  # RGB color to BGR
+ img = cv2.cvtColor(frame,cv2.COLOR_BGR2GRAY)  # BGR color to gray level
+ img = cv2.cvtColor(frame,cv2.COLOR_RGB2GRAY)  # RGB color to gray level
+ img = cv2.cvtColor(frame,cv2.COLOR_BGR2HSV)   # BGR color to HSV
+ img = cv2.cvtColor(frame,cv2.COLOR_RGB2HSV)   # RGB color to HSV
+ img = cv2.cvtColor(frame,cv2.COLOR_RGB2HLS)   # RGB color to HLS
+ img = cv2.cvtColor(frame,cv2.COLOR_BGR2HLS)   # BGR color to HLS
+ img = cv2.cvtColor(frame,cv2.COLOR_BGR2XYZ)   # RGB color to CIE XYZ.Rec 709
+ img = cv2.cvtColor(frame,cv2.COLOR_RGB2XYZ)   # RGB color to CIE XYZ.Rec 709
+ img = cv2.cvtColor(frame,cv2.COLOR_BGR2Lab)   # BGR color to CIE L\*a\*b\*
+ img = cv2.cvtColor(frame,cv2.COLOR_RGB2Luv) # RGB color to CIE L\*u\*v\*import numpy as np
import cv2
cap = cv2.VideoCapture(0)
while(True):
# Capture frame-by-frame
ret, frame = cap.read()
# Our operations on the frame come here
#img = cv2.cvtColor(frame, cv2.COLOR_BGR2RGB)
img = cv2.cvtColor(frame,cv2.COLOR_BGR2GRAY) # BGR color to gray level
# Display the resulting image
cv2.imshow('Gray',img)
if cv2.waitKey(1) & 0xFF == ord('q'): # press q to quit
break
# When everything done, release the capture
cap.release()
cv2.destroyAllWindows()
Sample Screenshots:
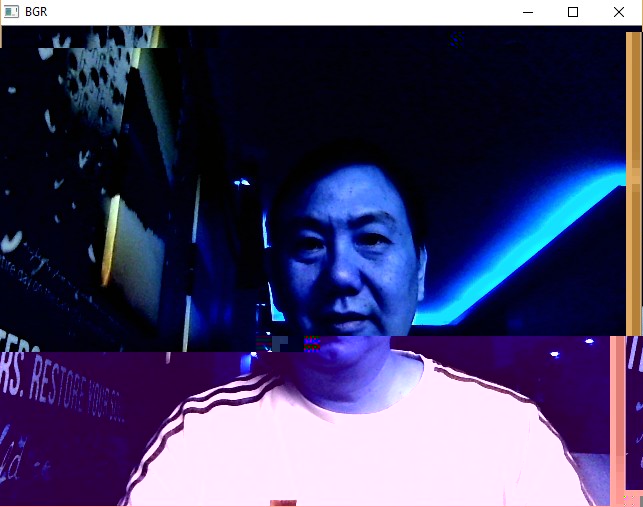
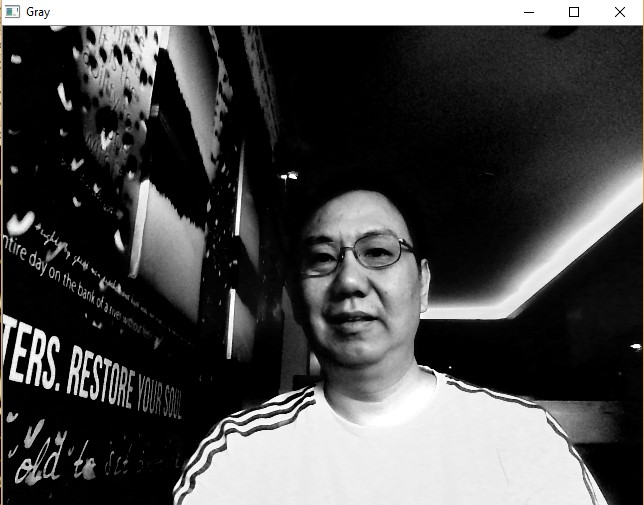
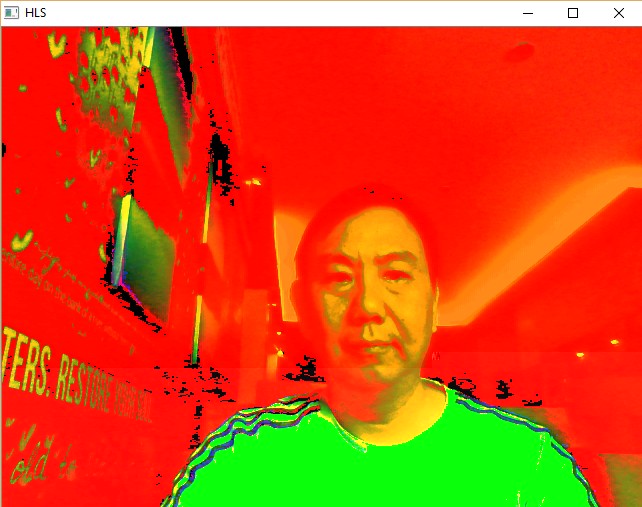
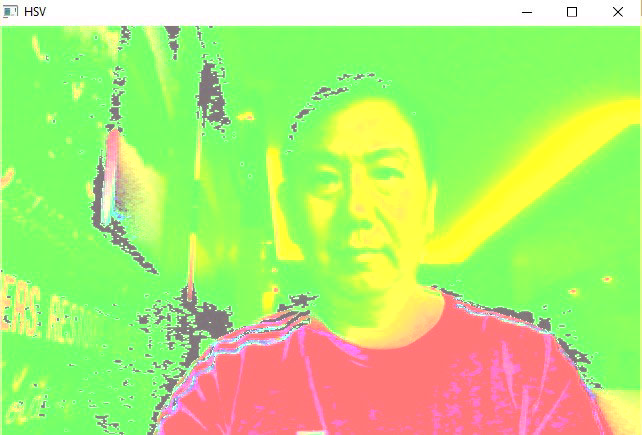
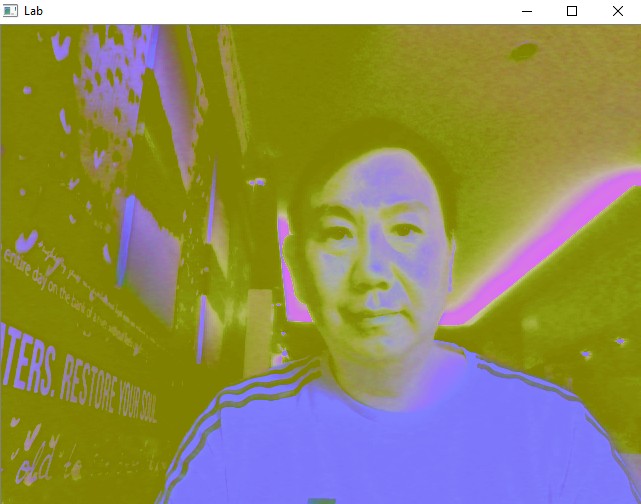
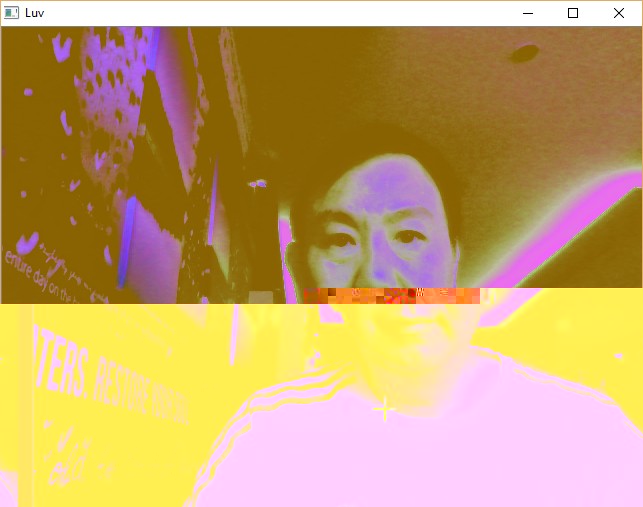
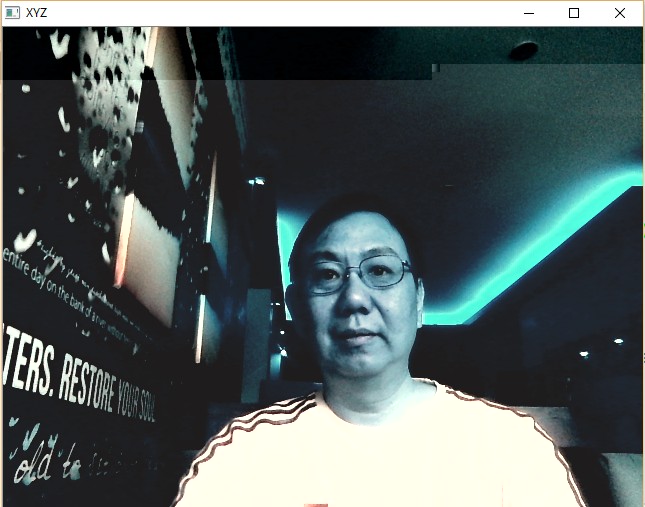
Image Enhancement
Using Histogram equalization, we can enhance the contrast of the image. OpenCV equalizeHist() function is working only for grayscale image. The following code is useful to enhance the constrast of color image.
check OpenCV documentation on histogram equalization
import numpy as np
import cv2

def equalizeHistColor(frame):
    # equalize the histogram of color image
    img = cv2.cvtColor(frame, cv2.COLOR_RGB2HSV)  # convert to HSV
    img[:,:,2] = cv2.equalizeHist(img[:,:,2])     # equalize the histogram of the V channel
    return cv2.cvtColor(img, cv2.COLOR_HSV2RGB)   # convert the HSV image back to RGB format


# start video capture
cap = cv2.VideoCapture(0)
while(True):
    # Capture frame-by-frame
    ret, frame = cap.read()

    # Our operations on the frame come here
    #img = frame
    img = equalizeHistColor(frame)


    # Display the resulting image
    cv2.imshow('Histogram Equalization',img)
    if cv2.waitKey(1) & 0xFF == ord('q'):  # press q to quit
        break

# When everything done, release the capture
cap.release()
cv2.destroyAllWindows()
Sample Screenshots:

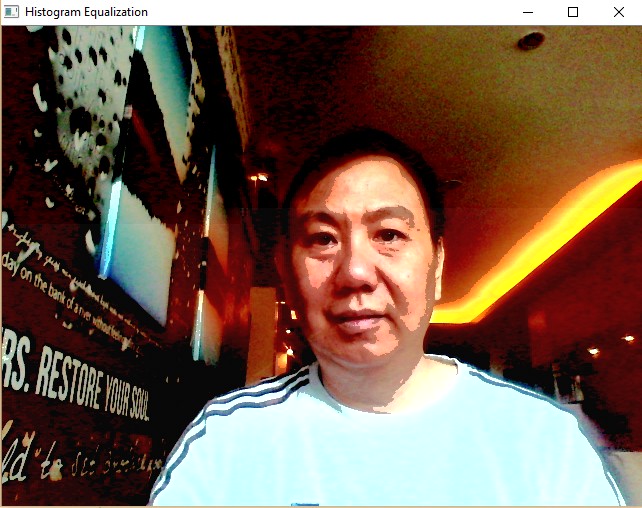
Image Transformation
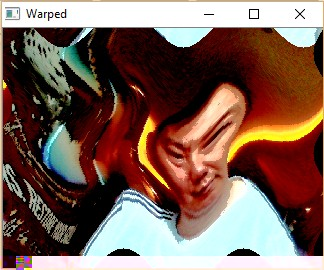
Let us have some fun to warp our video capture.
import numpy as np
import math
import cv2

def WarpImage(frame):
    ax,bx=10.0,100
    ay,by=20.0,120
    img=np.zeros(frame.shape,dtype=frame.dtype)
    rows,cols=img.shape[:2]

    for i in range(rows):
        for j in range(cols):
            offset_x=int(ax*math.sin(2*math.pi*i/bx))
            offset_y=int(ay*math.cos(2*math.pi*j/by))
            if i+offset_y<rows and j+offset_x<cols:
                img[i,j]=frame[(i+offset_y)%rows,(j+offset_x)%cols]
            else:
                img[i,j]=0
    return img

def equalizeHistColor(frame):
    # equalize the histogram of color image
    img = cv2.cvtColor(frame, cv2.COLOR_RGB2HSV)  # convert to HSV
    img[:,:,2] = cv2.equalizeHist(img[:,:,2])     # equalize the histogram of the V channel
    return cv2.cvtColor(img, cv2.COLOR_HSV2RGB)   # convert the HSV image back to RGB format


# start video capture
cap = cv2.VideoCapture(0)
while(cap.isOpened()):
    # Capture frame-by-frame
    ret, frame = cap.read()
    frame=cv2.resize(frame,None,fx=0.5,fy=0.5,interpolation=cv2.INTER_AREA)

    # Our operations on the frame come here
    if ret==1:
        #img = WarpImage(frame)
        img = equalizeHistColor(WarpImage(frame))
    else:
        img = equalizeHistColor(frame)

    # Display the resulting image
    cv2.imshow('Warped',img)
    if cv2.waitKey(1) & 0xFF == ord('q'):  # press q to quit
        break

# When everything done, release the capture
cap.release()
cv2.destroyAllWindows()
Sample Screenshots:
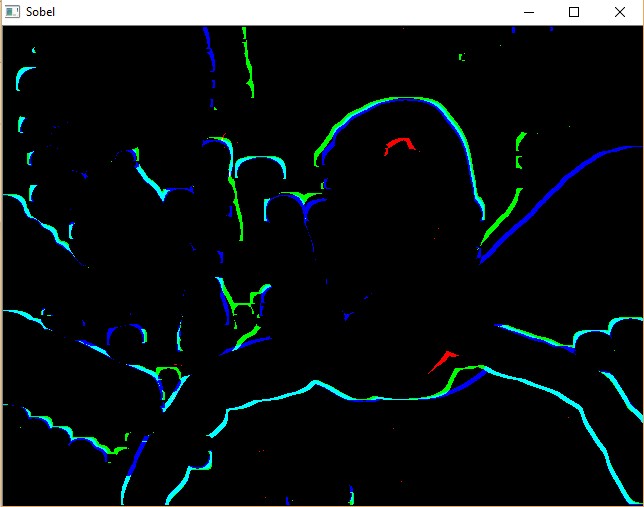
Edge Detection & Smoothing
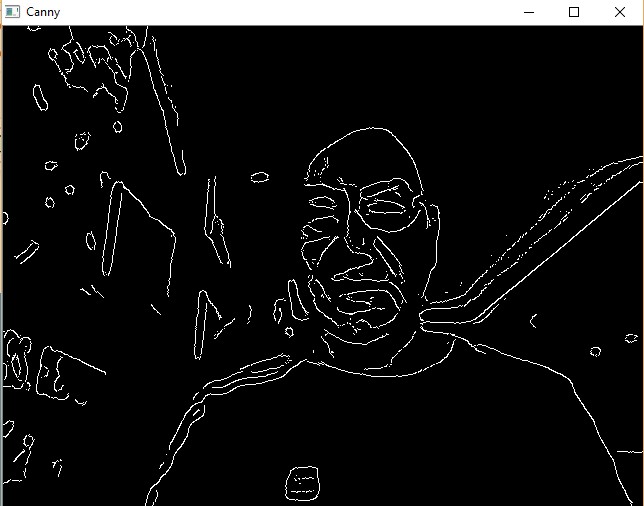
Reuse the Basic Video Capture code. Let us change our operation into an Edge Detection.
First, we use Canny Edge detection with three parameters. Check OpenCV documentation about Canny().
Try to improve the edge detection
Experiments:
- Try to change the parameter values of Edge Detection
- Try to use or not to use Smoothing filter before or after the edge detection
- frame = cv2.GaussianBlur(frame, (kernelSize,kernelSize), 0, 0) # Gaussian Blur smoothing filter
- frame = cv2.medianBlur(frame, kernelSize) # Median Blur smoothing filter
- frame = cv2.blur(frame,(kernelSize,kernelSize)) # Average Blur smoothing filter
- frame = cv2.bilateralFilter(frame,9,75,75) # Bilateral Filter for smoothing filter
- Try to change kernel size of the smoothing filter
- Try to change the Edge Detection Algorithm:
- frame = cv2.Canny(frame,parameter1,parameter2,intApertureSize) # Canny edge detection
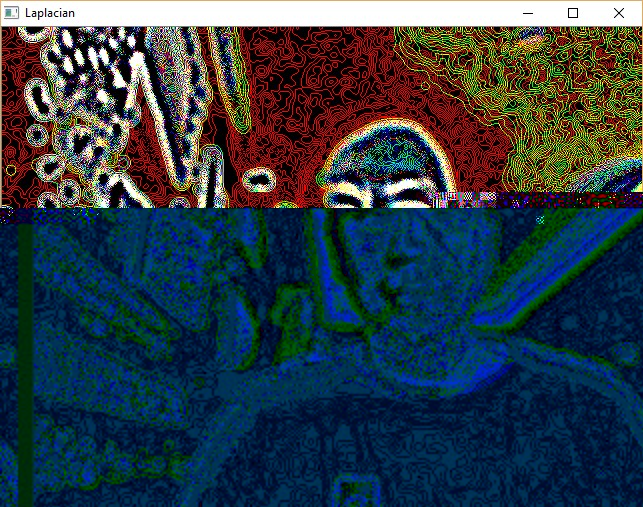
- frame = cv2.Laplacian(frame,cv2.CV_64F) # Laplacian edge detection
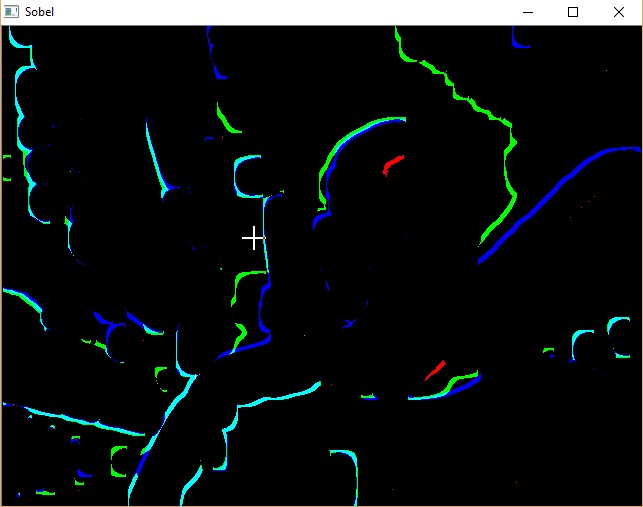
- frame = cv2.Sobel(frame,cv2.CV_64F,1,0,ksize=kernelSize) # X-direction Sobel edge detection
- frame = cv2.Sobel(frame,cv2.CV_64F,0,1,ksize=kernelSize) # Y-direction Sobel edge detection
import numpy as np
import cv2

kernelSize=21   # Kernel Bluring size

# Edge Detection Parameter
parameter1=20
parameter2=60
intApertureSize=1

cap = cv2.VideoCapture(0)
while(True):
    # Capture frame-by-frame
    ret, frame = cap.read()

    # Our operations on the frame come here
    frame = cv2.GaussianBlur(frame, (kernelSize,kernelSize), 0, 0)
    frame = cv2.Canny(frame,parameter1,parameter2,intApertureSize)  # Canny edge detection
    #frame = cv2.Laplacian(frame,cv2.CV_64F) # Laplacian edge detection
    #frame = cv2.Sobel(frame,cv2.CV_64F,1,0,ksize=kernelSize) # X-direction Sobel edge detection
    #frame = cv2.Sobel(frame,cv2.CV_64F,0,1,ksize=kernelSize) # Y-direction Sobel edge detection

    # Display the resulting frame
    cv2.imshow('Canny',frame)
    if cv2.waitKey(1) & 0xFF == ord('q'):  # press q to quit
        break
# When everything done, release the capture
cap.release()
cv2.destroyAllWindows()
Sample Screenshots:
Super Impose
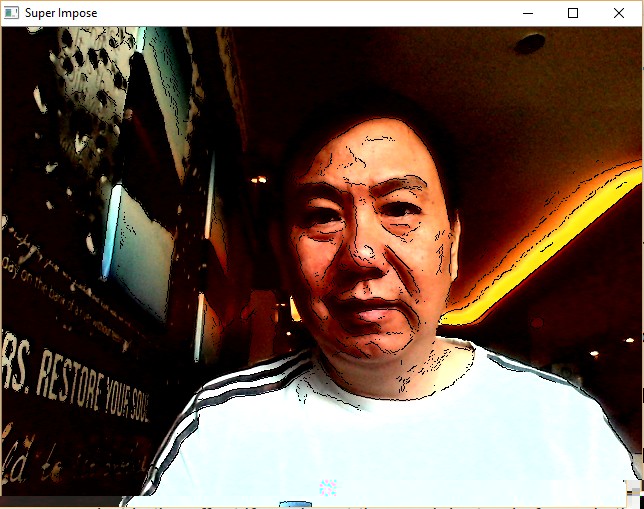
Let us use the edge detection as our mask and superimpose it with the original image. First we reverse the edge detection result using bitwise Not to inverse it. Then, we use bitwise And to superimpose with the blur image.
You will see yourself with an edge.
Experiments
- Use different smoothing algorithm and various parameters values.
- Use Bluring frame rather than the original image to be superimposed.
- Use edge detection directly without inverting it. What happen if you did not invert the edge?
import numpy as np
import cv2

kernelSize=21   # Kernel Bluring size

# Edge Detection Parameter
parameter1=10
parameter2=40
intApertureSize=1

cap = cv2.VideoCapture(0)
while(True):
    # Capture frame-by-frame
    ret, frame1 = cap.read()

    # Our operations on the frame come here
    frame = cv2.GaussianBlur(frame1, (kernelSize,kernelSize), 0, 0)
    edge = cv2.Canny(frame,parameter1,parameter2,intApertureSize)  # Canny edge detection
    mask_edge = cv2.bitwise_not(edge)
    frame = cv2.bitwise_and(frame1,frame1,mask = mask_edge)

    # Display the resulting frame
    cv2.imshow('Super Impose',frame)
    if cv2.waitKey(1) & 0xFF == ord('q'):  # press q to quit
        break
# When everything done, release the capture
cap.release()
cv2.destroyAllWindows()
Sample Screenshot:
Thresholding
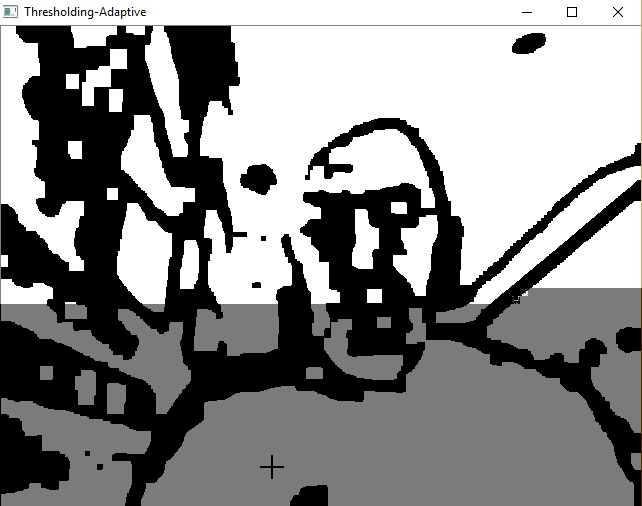
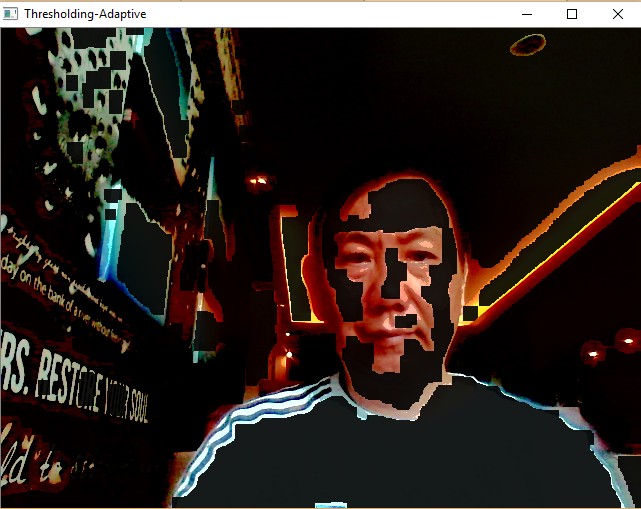
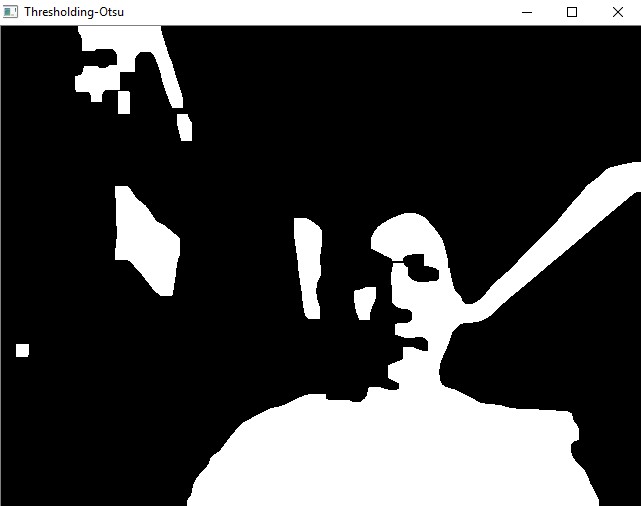
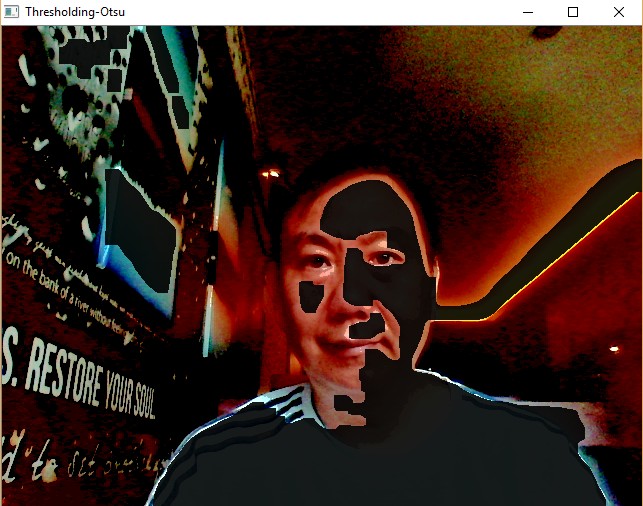
Use threshold to create a mask. A mask is a binary image.
Adaptive threshold has the following parameters:
- src – Source 8-bit single-channel image.
- dst – Destination image of the same size and the same type as src .
- maxValue – Non-zero value assigned to the pixels for which the condition is satisfied. Put 255.
- adaptiveMethod – Adaptive thresholding algorithm to use, ADAPTIVE_THRESH_MEAN_C or ADAPTIVE_THRESH_GAUSSIAN_C .
- thresholdType – Thresholding type that must be either THRESH_BINARY or THRESH_BINARY_INV .
- blockSize – Size of a pixel neighborhood that is used to calculate a threshold value for the pixel: 3, 5, 7, and so on.
- C – Constant subtracted from the mean or weighted mean.
See also: documentation on AdaptiveThreshold
Experiments:
- What happen if you do not use smoothing before the threshold?
- Change the threshold values between 0 to 255
- Change the thresholding methods:
- ret, mask = cv2.threshold(gray,threshold1, threshold2,cv2.THRESH_BINARY+cv2.THRESH_OTSU)
- mask = cv2.adaptiveThreshold(gray,255,cv2.ADAPTIVE_THRESH_MEAN_C,cv2.THRESH_BINARY,blockSize,constant)
- mask = cv2.adaptiveThreshold(gray,255,cv2.ADAPTIVE_THRESH_GAUSSIAN_C,cv2.THRESH_BINARY,blockSize,constant)
- ret, mask = cv2.threshold(gray, threshold1, threshold2, cv2.THRESH_BINARY)
- what is the effect if you invert the mask instead of merely the mask?
mask_inv = cv2.bitwise_not(mask)
img = cv2.bitwise_and(frame,frame,mask = mask_inv)
What happen if you see only the mask:
img=mask
What is you use gray image instead of the color frame?
img = cv2.bitwise_and(gray,gray,mask = mask) img = cv2.bitwise_and(frame,frame,mask = mask)
Why if you mixed gray image and color frame in bitwise And, it does not work?
- What happen if you add or remove image blendng:
img = cv2.addWeighted(frame,0.1,img,0.9,0)
import numpy as np
import cv2

def equalizeHistColor(frame):
    # equalize the histogram of color image
    img = cv2.cvtColor(frame, cv2.COLOR_RGB2HSV)  # convert to HSV
    img[:,:,2] = cv2.equalizeHist(img[:,:,2])     # equalize the histogram of the V channel
    return cv2.cvtColor(img, cv2.COLOR_HSV2RGB)   # convert the HSV image back to RGB format


threshold1=100
threshold2=200
cap = cv2.VideoCapture(0)
while(True):
    # Capture frame-by-frame
    ret, frame = cap.read()  # ret = 1 if the video is captured; frame is the image

    # equalize the histogram of color image
    frame1 = equalizeHistColor(frame)
    gray = cv2.cvtColor(frame1,cv2.COLOR_BGR2GRAY)
    blur = cv2.GaussianBlur(gray,(21,21),0)

    #ret, mask = cv2.threshold(blur, threshold1, threshold2, cv2.THRESH_BINARY)
    ret, mask = cv2.threshold(blur,0,255,cv2.THRESH_BINARY+cv2.THRESH_OTSU)
    #ret, mask = cv2.threshold(blur,threshold1, threshold2,cv2.THRESH_BINARY+cv2.THRESH_OTSU)
    #mask = cv2.adaptiveThreshold(blur,255,cv2.ADAPTIVE_THRESH_MEAN_C,cv2.THRESH_BINARY,11,2)
    #mask = cv2.adaptiveThreshold(blur,255,cv2.ADAPTIVE_THRESH_GAUSSIAN_C,cv2.THRESH_BINARY,11,2)
    kernel = np.ones((3, 3), np.uint8)
    mask=cv2.erode(mask,kernel,iterations=7) # morphology erosion
    mask=cv2.dilate(mask,kernel,iterations=5) # morphology dilation

    mask_inv = cv2.bitwise_not(mask)
    img = cv2.bitwise_and(frame1,frame1,mask = mask_inv)
    img = cv2.addWeighted(frame1,0.1,img,0.9,0)

    #img=mask

    # Display the resulting image
    cv2.imshow('Thresholding-Otsu',img)
    if cv2.waitKey(1) & 0xFF == ord('q'):  # press q to quit
        break

# When everything done, release the capture
cap.release()
cv2.destroyAllWindows()
Sample Screenshots:
Countour
Two main functions of contours are :
- img, contours, hierarchy = cv2.findContours(thresh,cv2.RETR_TREE,chainRuleApproximation)
- img=cv2.drawContours(img, contours, index, colorTuple, thickness)
The arguments are:
- img = image
- index=-1 means show all contours, 0-len(contours) means to show each contour
- chainRuleApproximation is either:
- cv2.CHAIN_APPROX_SIMPLE: to give only 4 points in a rectangle
- cv2.CHAIN_APPROX_NONE: to give all points
- colorTuple is any BGR color. For instance:
- (255,0,0) for Blue
- (0,255,0) for Green
- (0,0,255) for Red
- thickness is integer 1-10
Check the documentation of FindContours , Contour Features, Draw Contour
The code below capture video images via web cam, then show the image overlayed with the contour and bounding box.
import numpy as np
import cv2
import time

color=(255,0,0)
thickness=2

cap = cv2.VideoCapture(0)
while(True):
    # Capture frame-by-frame
    ret, frame = cap.read()  # ret = 1 if the video is captured; frame is the image

    # Our operations on the frame come here
    gray = cv2.cvtColor(frame,cv2.COLOR_BGR2GRAY)
    #blur = cv2.GaussianBlur(gray,(21,21),0)
    ret,thresh = cv2.threshold(gray,10,20,cv2.THRESH_BINARY_INV)
    img1, contours, hierarchy = cv2.findContours(thresh,cv2.RETR_TREE,cv2.CHAIN_APPROX_NONE)
    if len(contours) != 0:
            c = max(contours, key = cv2.contourArea) # find the largest contour
            x,y,w,h = cv2.boundingRect(c)          # get bounding box of largest contour
            #img2=cv2.drawContours(frame, c, -1, color, thickness) # draw largest contour
            img2=cv2.drawContours(frame, contours, -1, color, thickness) # draw all contours
            img3 = cv2.rectangle(img2,(x,y),(x+w,y+h),(0,0,255),2)  # draw red bounding box in img

    # Display the resulting image
    cv2.imshow('Contour',img3)
    if cv2.waitKey(1) & 0xFF == ord('q'):  # press q to quit
        break

# When everything done, release the capture
cap.release()
cv2.destroyAllWindows()
Sample Screenshot:

Optical Flow
The following code is a slighly modified version of Lucas Kanade optical flow from OpenCV tutorial. It created aura near your head. As usual, press q to quit.
import numpy as np
import cv2

cap = cv2.VideoCapture(0)
ret, frame1 = cap.read()

prvs = cv2.cvtColor(frame1,cv2.COLOR_BGR2GRAY)
hsv = np.zeros_like(frame1)
hsv[...,1] = 255
while(1):
    ret, frame2 = cap.read()

    # Our operations on the frame come here
    next = cv2.cvtColor(frame2,cv2.COLOR_BGR2GRAY)
    flow = cv2.calcOpticalFlowFarneback(prvs,next, None, 0.5, 3, 15, 3, 5, 1.2, 0)
    mag, ang = cv2.cartToPolar(flow[...,0], flow[...,1])
    hsv[...,0] = ang*180/np.pi/2
    hsv[...,2] = cv2.normalize(mag,None,0,255,cv2.NORM_MINMAX)
    bgr = cv2.cvtColor(hsv,cv2.COLOR_HSV2BGR)
    prvs = next

    # Display the resulting frame
    cv2.imshow('Optical Flow Aura',bgr)
    if cv2.waitKey(2) & 0xFF == ord('q'):  # press q to quit
        break

# When everything done, release the capture
cap.release()
cv2.destroyAllWindows()
Sample Screenshots:
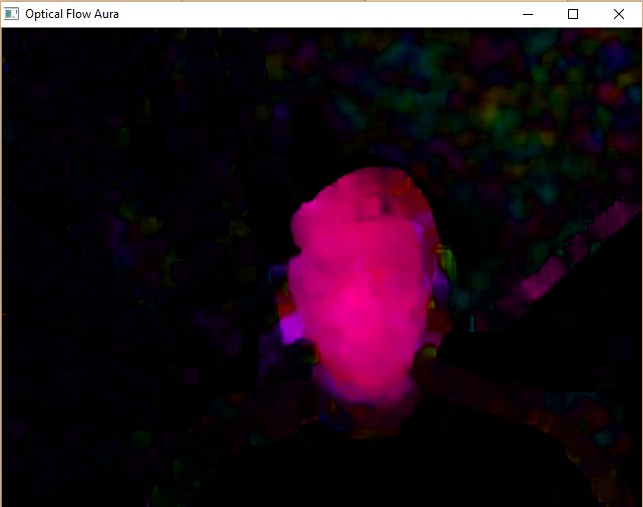
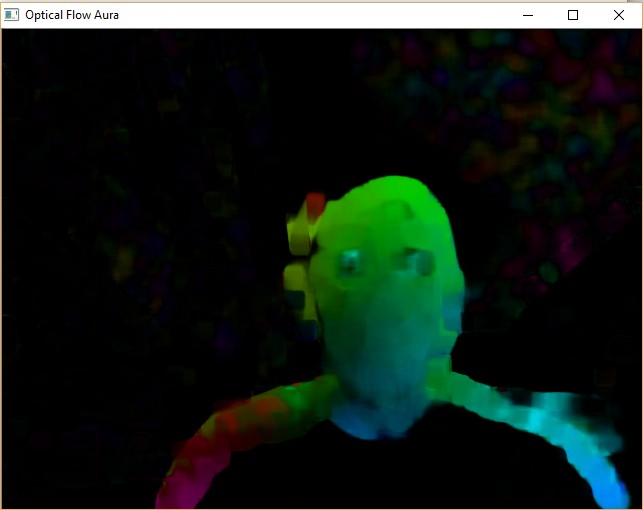
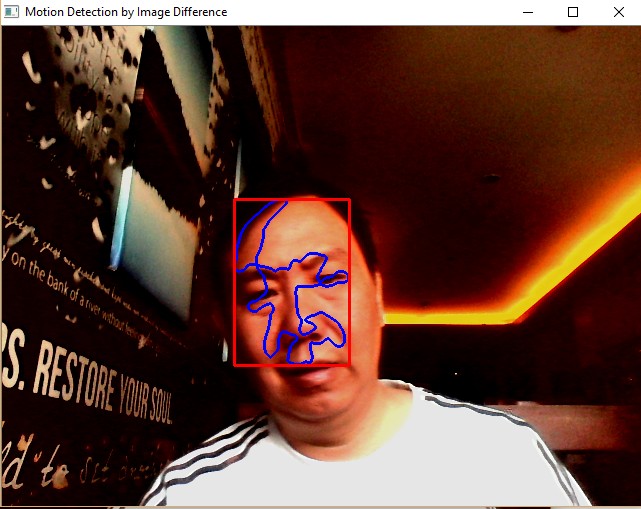
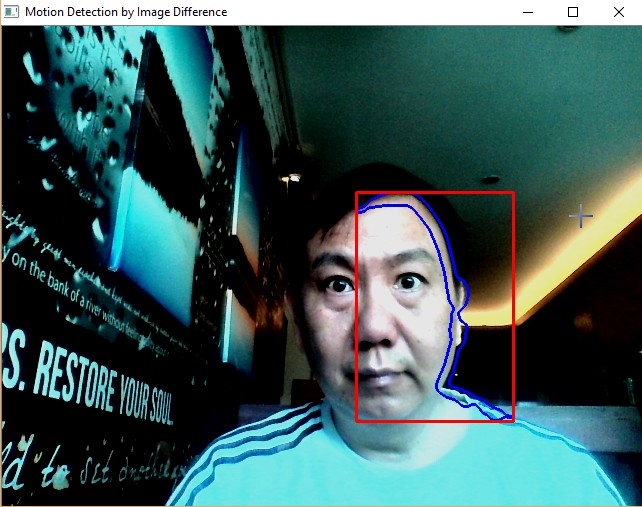
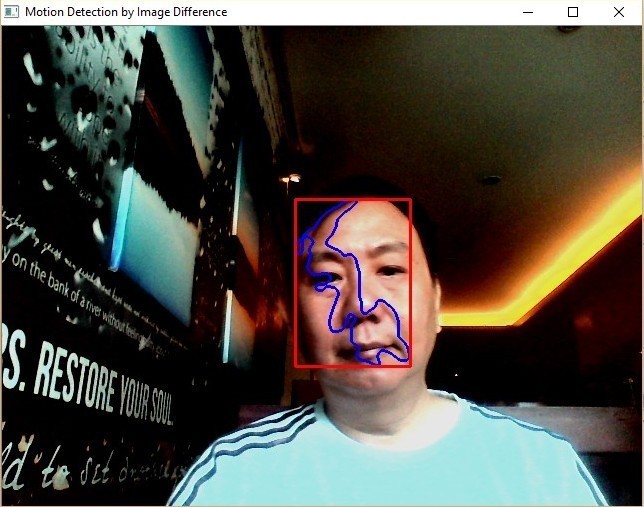
Image Difference: Motion Detection
One way to detect a moving object is through image difference. Two images are captured with a slight time delay of 1/25 seconds.
Once we have the image difference, get the contour out of it and put the bounding box out of the contour.
import numpy as np
import cv2
import time

color=(255,0,0)
thickness=2

cap = cv2.VideoCapture(0)
while(True):
    # Capture two frames
    ret, frame1 = cap.read()  # first image
    time.sleep(1/25)          # slight delay
    ret, frame2 = cap.read()  # second image
    img1 = cv2.absdiff(frame1,frame2)  # image difference

    # get theshold image
    gray = cv2.cvtColor(img1,cv2.COLOR_BGR2GRAY)
    blur = cv2.GaussianBlur(gray,(21,21),0)
    ret,thresh = cv2.threshold(blur,200,255,cv2.THRESH_OTSU)

    # combine frame and the image difference
    img2 = cv2.addWeighted(frame1,0.9,img1,0.1,0)

    # get contours and set bounding box from contours
    img3, contours, hierarchy = cv2.findContours(thresh,cv2.RETR_TREE,cv2.CHAIN_APPROX_NONE)
    if len(contours) != 0:
        for c in contours:
            rect = cv2.boundingRect(c)
            height, width = img3.shape[:2]
            if rect[2] > 0.2*height and rect[2] < 0.7*height and rect[3] > 0.2*width and rect[3] < 0.7*width:
                x,y,w,h = cv2.boundingRect(c)            # get bounding box of largest contour
                img4=cv2.drawContours(img2, c, -1, color, thickness)
                img5 = cv2.rectangle(img2,(x,y),(x+w,y+h),(0,0,255),2)  # draw red bounding box in img
            else:
                img5=img2
    else:
        img5=img2

    # Display the resulting image
    cv2.imshow('Motion Detection by Image Difference',img2)
    if cv2.waitKey(1) & 0xFF == ord('q'):  # press q to quit
        break

# When everything done, release the capture
cap.release()
cv2.destroyAllWindows()
Sample Screenshots:
Face Detection
import numpy as np
import cv2
folder='C:\\Users\\Teknomo\\Downloads\\opencv\\sources\\data\\haarcascades_cuda\\'
face_casc = cv2.CascadeClassifier(folder+'haarcascade_frontalface_default.xml')
eye_casc=cv2.CascadeClassifier(folder+'haarcascade_eye.xml')

color=(0,255,0)
thickness=3

cap = cv2.VideoCapture(0)
while(True):
    # Capture frame-by-frame
    ret, frame = cap.read()  # ret = 1 if the video is captured; frame is the image

    # Our operations on the frame come here
    gray = cv2.cvtColor(frame,cv2.COLOR_BGR2GRAY)
    gray = cv2.equalizeHist(gray)
    faces = face_casc.detectMultiScale(gray, scaleFactor=1.1,minNeighbors=3)

    img=frame                     # default if face is not found
    for(x,y,w,h) in faces:
        roi_gray=gray[y:y+h,x:x+w]
        roi_color=frame[y:y+h,x:x+w]
        #img=cv2.rectangle(frame, (x, y), (x + w, y + h), color, thickness) # box for face
        eyes=eye_casc.detectMultiScale(roi_gray)
        for(x_eye,y_eye,w_eye,h_eye) in eyes:
            center=(int(x_eye+0.5*w_eye),int(y_eye+0.5*h_eye))
            radius=int(0.3*(w_eye+h_eye))
            img=cv2.circle(roi_color,center,radius,color,thickness)
            #img=cv2.circle(frame,center,radius,color,thickness)


    # Display the resulting image
    cv2.imshow('Face Detection Harr',img)
    if cv2.waitKey(1) & 0xFF == ord('q'):  # press q to quit
        break

# When everything done, release the capture
cap.release()
cv2.destroyAllWindows()
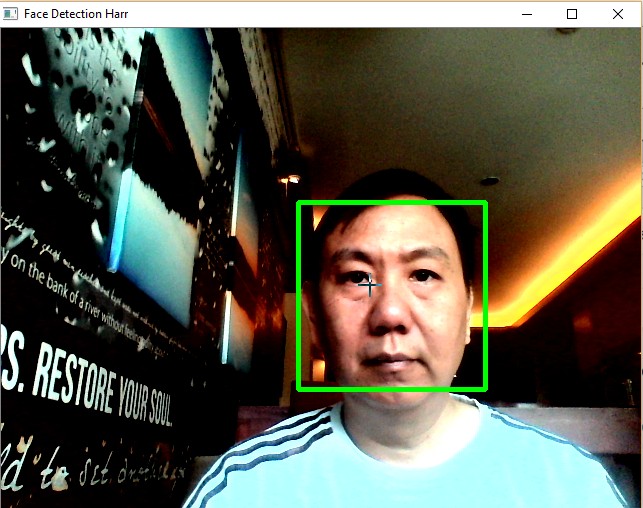
Sample Screenshot:
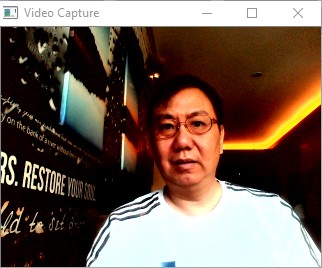
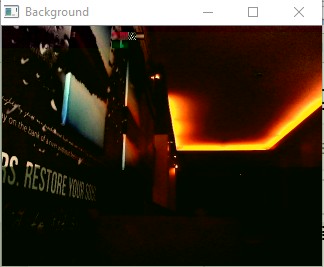
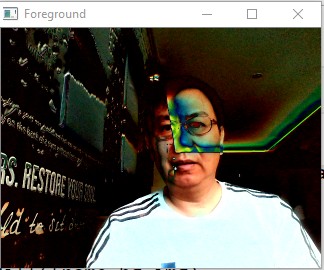
Background Subtraction
To generate the background image, take average of frames.The camera is assumed to be static. Foreground is equal to the current frame minus the background.
import numpy as np
import cv2

alpha=0.999
isFirstTime=True
cap = cv2.VideoCapture(0)
while(True):
    # Capture frame-by-frame
    ret, frame = cap.read()  # ret = 1 if the video is captured; frame is the image
    frame=cv2.resize(frame,None,fx=0.5,fy=0.5,interpolation=cv2.INTER_AREA)

    # create background
    #if isFirstTime==True:
    #    bg_img=frame
    #    isFirstTime=False
    #else:
    #    bg_img = dst = cv2.addWeighted(frame,(1-alpha),bg_img,alpha,0)
    # the above code is the same as:
    fgmask = bg_img.apply(frame)

    # create foreground
    #fg_img=cv2.subtract(frame,bg_img)
    fg_img = cv2.absdiff(frame,bg_img)

    # Display the resulting image
    cv2.imshow('Video Capture',frame)
    cv2.imshow('Background',bg_img)
    cv2.imshow('Foreground',fgmask)
    if cv2.waitKey(1) & 0xFF == ord('q'):  # press q to quit
        break

# When everything done, release the capture
cap.release()
cv2.destroyAllWindows()
Sample Screenshots:
last update: September 2017
Cite this tutorial as:
Teknomo,K. (2017) Video Analysis using OpenCV-Python (http://people.revoledu.com/kardi/tutorial/Python/)
See Also: Python for Data Science
Visit www.Revoledu.com for more tutorials in Data Science
Copyright © 2017 Kardi Teknomo
Permission is granted to share this notebook as long as the copyright notice is intact.