<
Previous
|
Next
|
Contents
>
Read this tutorial comfortably off-line. Click here to purchase the complete E-book of this tutorial
Q-Learning using Excel
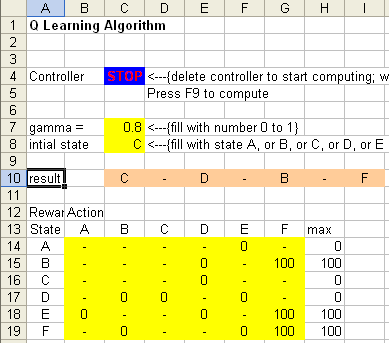
The spreadsheet companion of this tutorial contains two worksheets. No macro or any script included. The first worksheet (RL1) is only using spreadsheet to compute the Q matrix from R matrix (up to 5 iterations). The purpose is to give you idea on how it works. The second worksheet (RL1 Auto) is the main programs that use MS excel iteration. It can compute Q matrix until convergence value.
You can download the spreadsheet here
To compute it automatically, first please make sure that the Tools-Options-Calculation Tab > Iteration checkbox is ON. Then delete STOP cell and press F9.
To reset the controller, type any letter (e.g. STOP) in the blue cell.
Yellow cells are input cells you can modify them without affecting the program.
The results are in orange.
How the MS Excel Q learning works?
Unlike pure Q learning algorithm I explained in previous sections, Q learning in MS excel is using iteration. The result is the same but the model is much more simplified without any random number involve (thus deterministic).
If you read through all this tutorial, you will find that Q learning find the value of Q from initial state until the goal state. In this MS Excel program, however, I use the dual of this Q learning algorithm. Instead of finding one state until goal, in each step of the iteration, I am finding the Q value of all states. Eventually, it will reach the same result because of the convergence of Q learning.
I assume you know how to use MS Excel function VLOOKUP, INDEX, MATCH and IF. Refer to the help of Microsoft Excel if you are not sure about those internal functions.
<
Previous
|
Next
|
Contents
>
Preferable reference for this tutorial is
Teknomo, Kardi. 2005. Q-Learning by Examples. http://people.revoledu.com/kardi/tutorial/ReinforcementLearning/index.html


